This tutorial will walk you through setting up the Infinity Engine SDK, creating your first project, building a simple procedural system in the Infinity Creator, and integrating it into your application.
Prerequisites
- C++ compiler supporting C++17 or later (Visual Studio 2019+, GCC 9+, or Clang 10+)
- CMake 3.16 or higher
- Infinity Engine SDK downloaded and installed
- Infinity Creator installed (for visual system design)
Step 1: Project Setup
Create a new directory for your project and add a CMakeLists.txt file:
Step 2: Initialize the Engine
Create main.cpp with basic engine initialization:
Step 3: Build and Test
Build your project to ensure everything is working:
Windows (Visual Studio)
Linux/macOS
Run your executable to verify the setup:
You should see:
Step 4: Create a System in Infinity Creator
Now let's create a simple procedural system using the visual editor:
- Launch Infinity Creator
- Create a New Project
- Click "New Project" or File → New Project
- Choose a location and name for your project
- Design Your System
- Drag components from the Toolbox into the Procedural Graph View
- For a simple example, create a basic mesh generation system:
- Add a "Create Mesh" component (or similar sphere/cube generator)
- Add input parameters like "Scale" or "Subdivisions"
- Connect the components and configure their properties
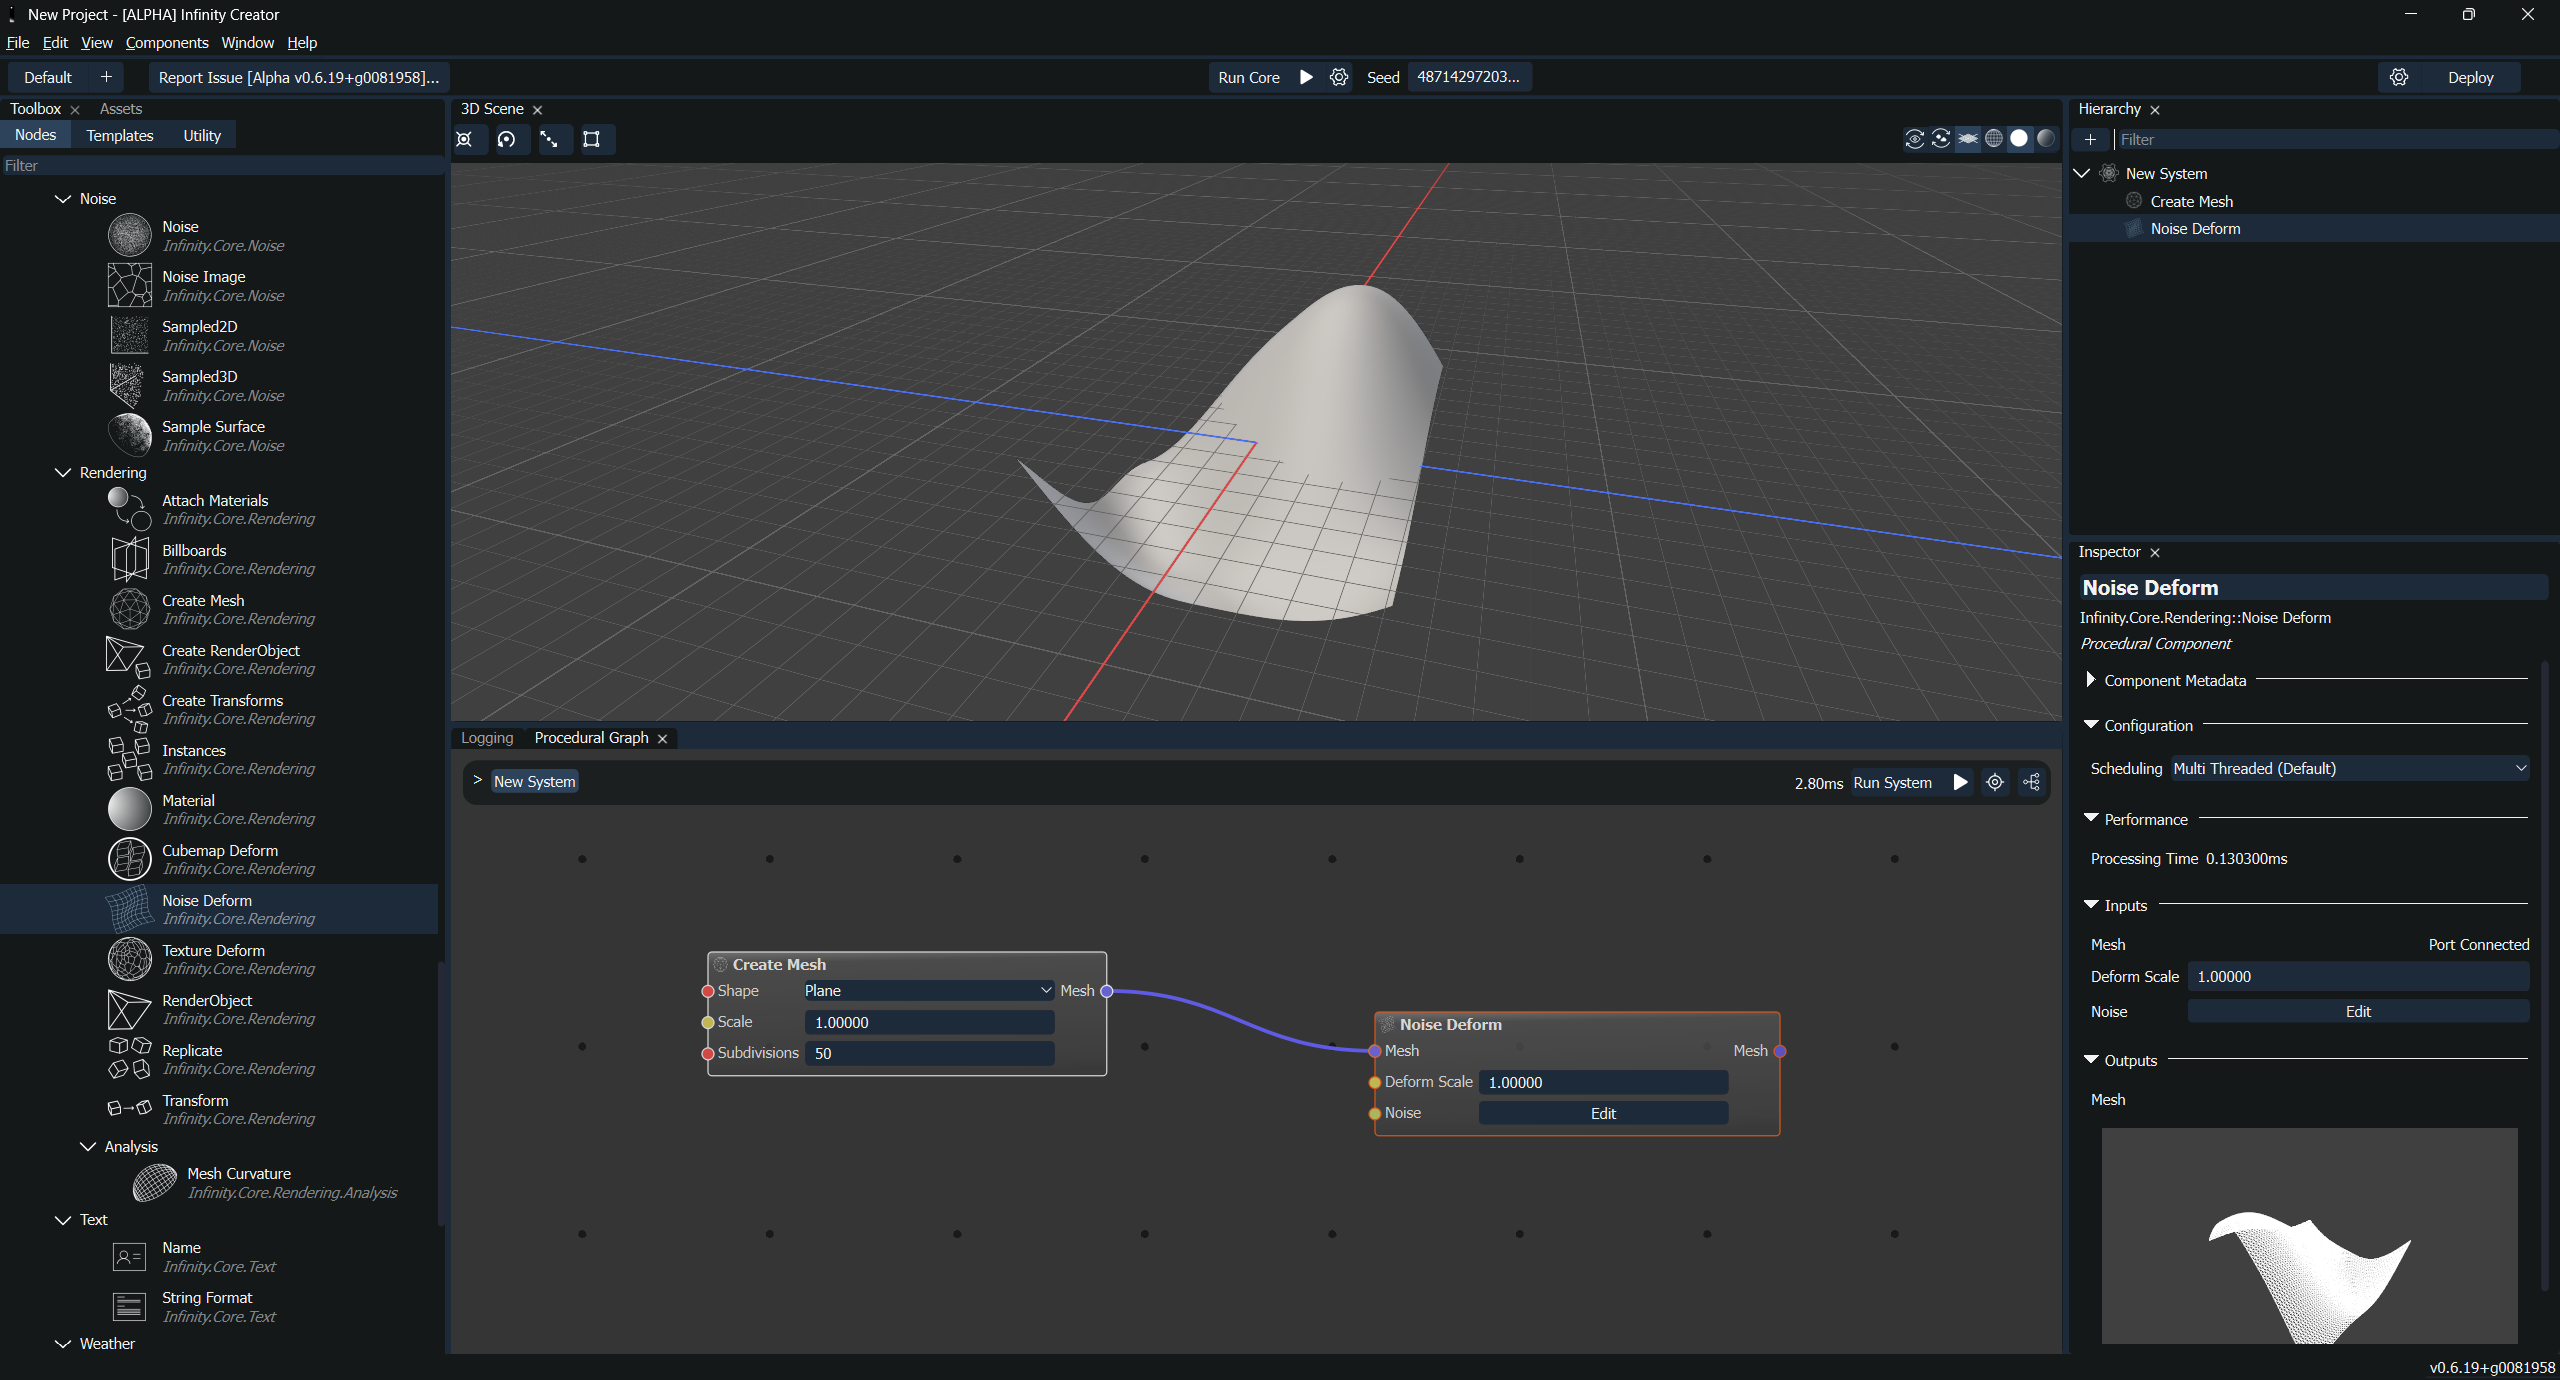
- Configure System Inputs/Outputs
- Add system-level input ports for external control
- Add output ports to retrieve generated data
- Name your system (e.g., "SimpleTerrainGenerator")
For detailed guidance on using the Creator interface, refer to the Infinity Creator Manual which provides comprehensive documentation on system design, component configuration, and workflow management.
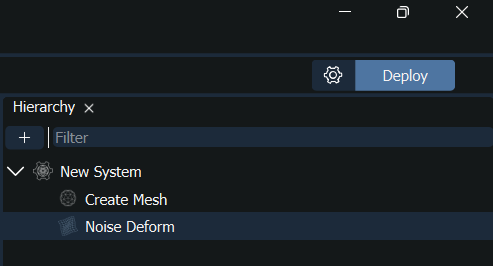
Step 5: Deploy Your System
Once you're satisfied with your system design:
- Click the Deploy Button
- Located on the right side of the Toolbar at the top of the UI
- Configure Deployment Options
- Library Export: Choose whether to export a copy of the Infinity shared library
- Usually unnecessary if you have the SDK installed
- Useful for deploying into other engines or standalone applications
- Code Generation: Enable auto-generation of helper code
- Multiple language options available (C++, C#, Python)
- Generates boilerplate code to access your systems
- Asset Deployment: Configure whether to deploy additional assets
- Library Export: Choose whether to export a copy of the Infinity shared library
- Set Deployment Path
- Choose where to save your
.infinitycorefile and related assets - Recommend creating a
assets/ordata/folder in your project
- Choose where to save your
- Deploy
- Click "Deploy" to export your system
- The
.infinitycorefile and any additional files will be saved to your chosen location
Step 6: Load and Use Your System
Update your main.cpp to load and execute your deployed system:
Platform-Specific Notes
Windows
- Ensure the Infinity Engine DLLs are in your PATH or next to your executable
- Use forward slashes or escaped backslashes in file paths
- Consider using vcpkg for dependency management
Linux
- Install development packages:
sudo apt-get install build-essential cmake - Ensure proper library linking with
-Wl,-rpathif needed - Set
LD_LIBRARY_PATHif libraries are not in standard locations
macOS
- Install Xcode command line tools:
xcode-select --install - Consider using Homebrew for CMake installation
- Handle framework linking if using the framework distribution
Troubleshooting
"InfinityEngine not found" during CMake configuration:
- Verify the SDK is properly installed
- Set
CMAKE_PREFIX_PATHto your SDK installation directory - Check that
find_package(InfinityEngine)can locate the config files
Runtime library errors:
- Ensure all required DLLs/shared libraries are accessible
- Check that you called
InfinityInit()before any other engine functions - Verify your project targets the same architecture (x64/x86) as the SDK
Core loading failures:
- Verify the
.infinitycorefile path is correct - Ensure all component libraries are in the expected locations
- Check file permissions and accessibility
Next Steps
Now that you have a working setup:
- Continue with Using the InfinityEngine API to learn more about engine functionality
- Explore Working with Procedural Systems for advanced system usage
- Try Creating Your First Procedural Component to build custom components